Renamer — give the dataset clean names
Camera names such as IMG_20260914_101501.png mean nothing to a training tool. The Renamer copies the files to Subject-Concept-0001.png, Subject-Concept-0002.png… in a random order.
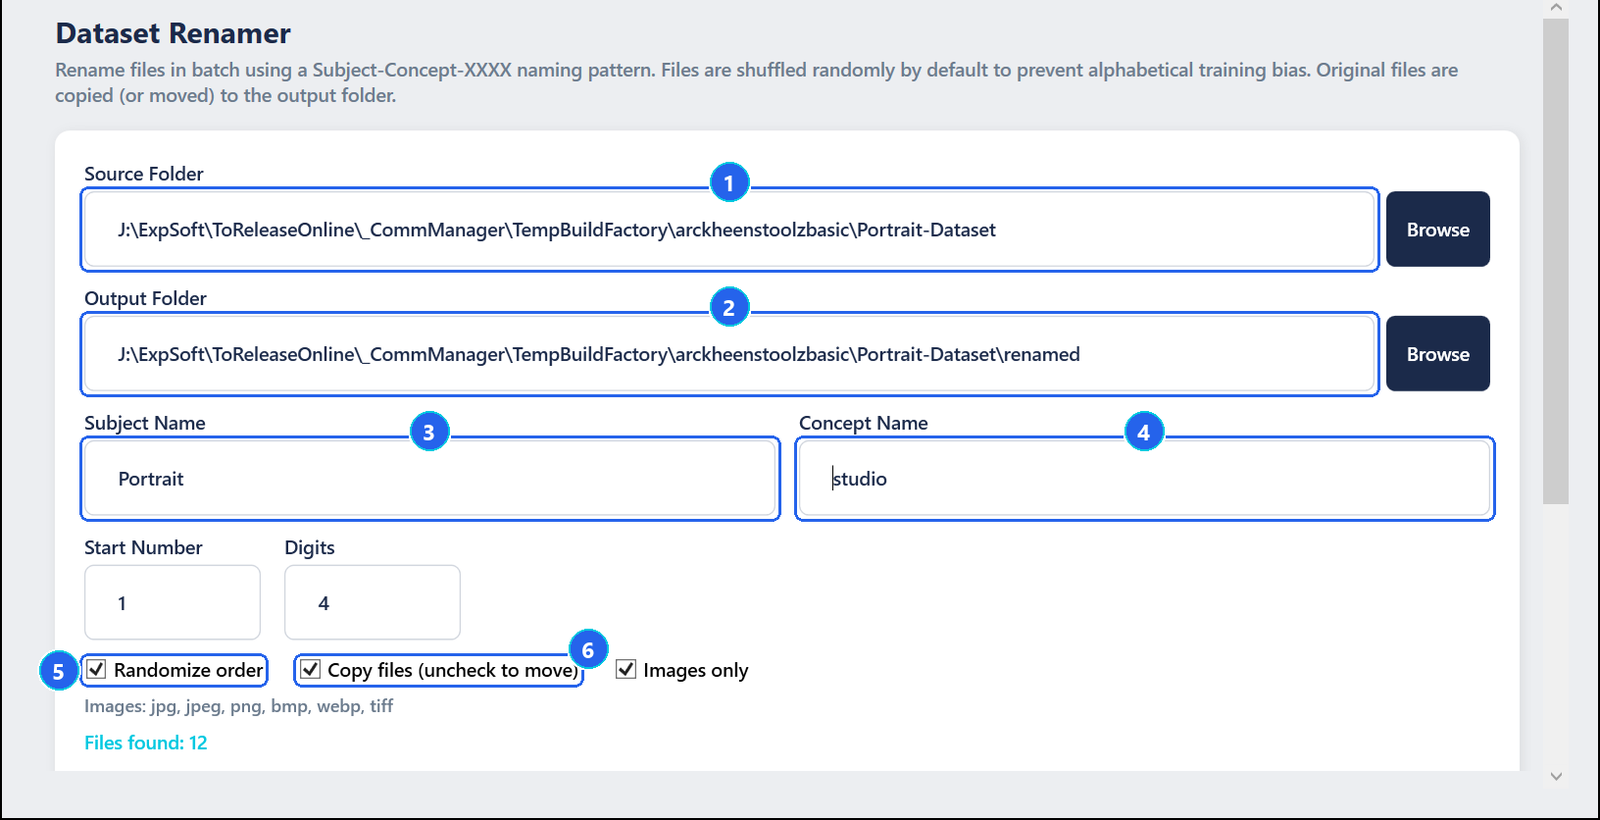
- 1Source Folder — the folder to rename. Sub-folders are included.
- 2Output Folder — filled in for you:
renamedinside the source. - 3Subject Name — the first part of the new names, for example the person or object.
- 4Concept Name — optional second part: a style, a place, a tag.
- 5Randomize order — shuffles the numbering so the training does not learn the original order.
- 6Copy files — on by default: the originals stay untouched. Untick it to move the files instead.
Start Number and Digits set the counter (4 digits = 0001). Images only skips non-image files. Click Run.
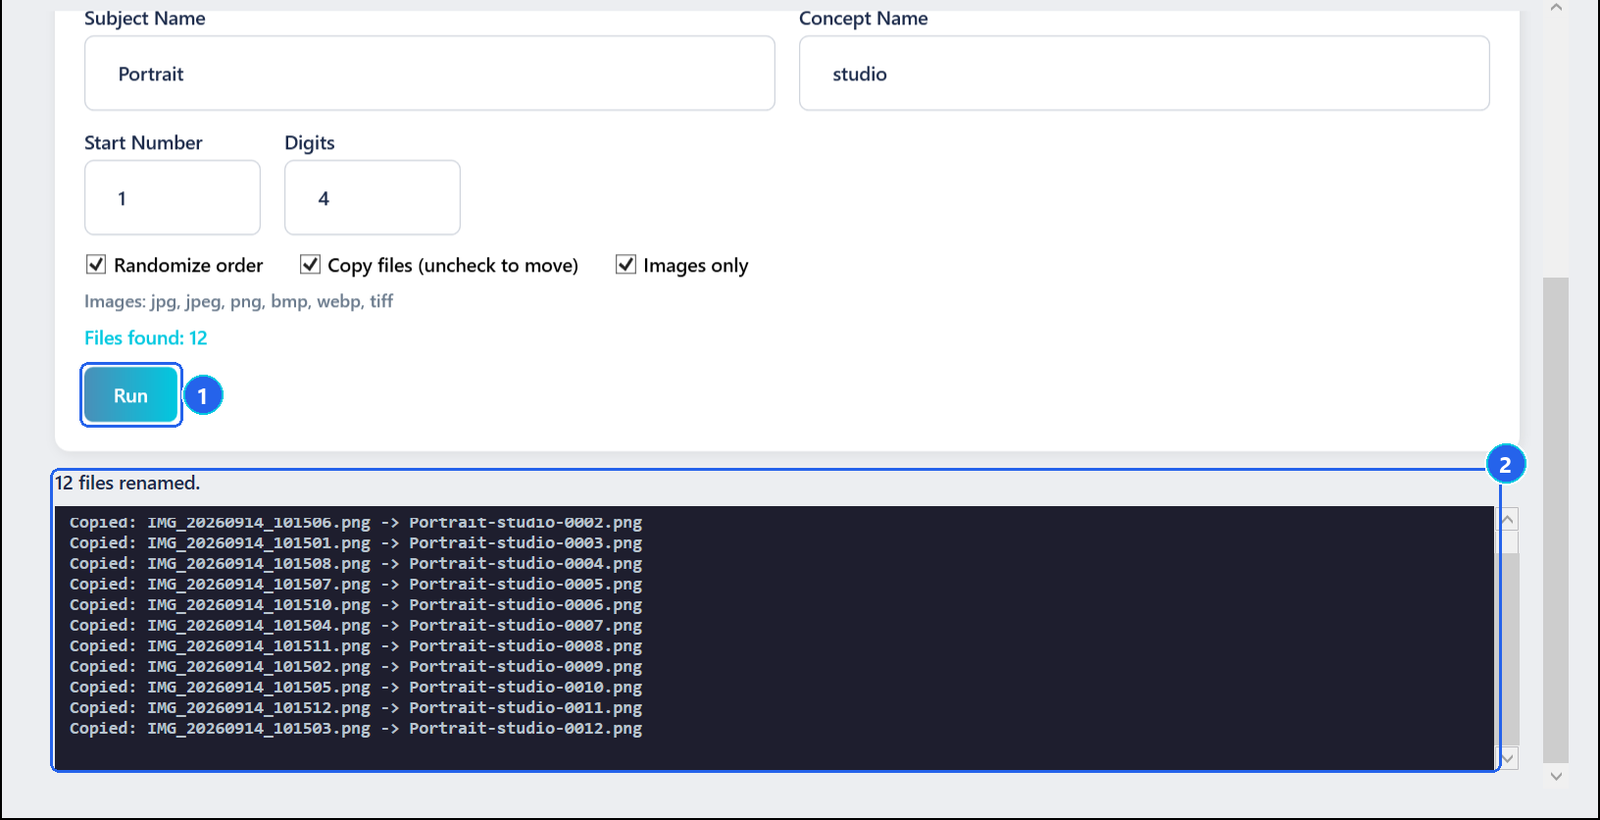
- 1Run — renames (copies) every file of the source.
- 2Log — one line per file: old name → new name.
Captions — one text file per image
Training tools read one .txt caption next to each image. Captions creates them all at once.
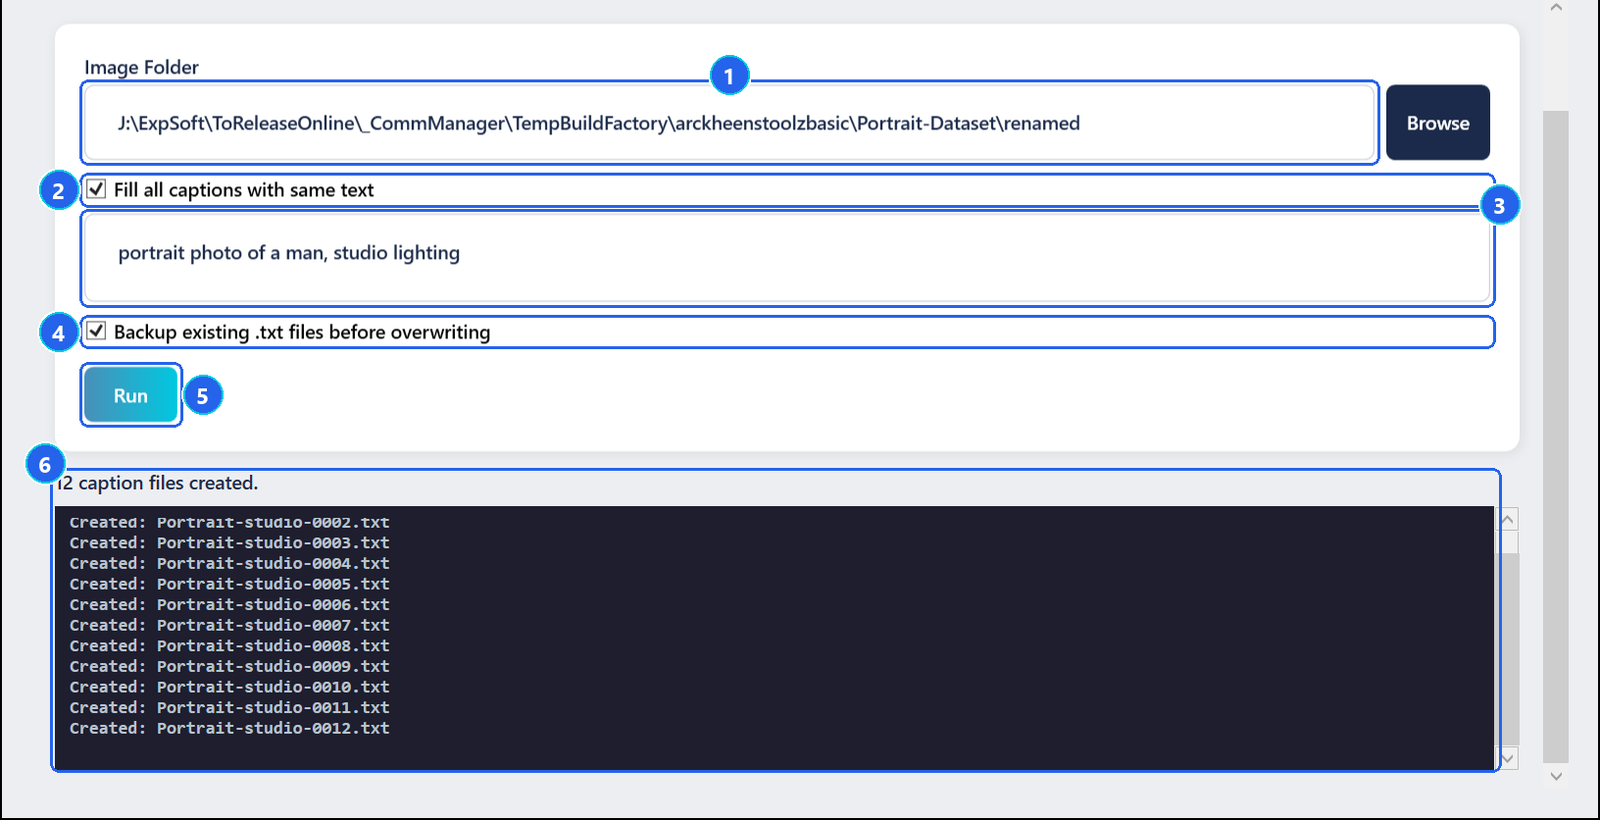
- 1Image Folder — the dataset (the files directly in it).
- 2Fill all captions with same text — writes the text below into every file; unticked, the files are empty.
- 3Caption text — for example a trigger phrase shared by the whole dataset.
- 4Backup existing .txt files — an existing caption is renamed with a timestamp before being replaced.
- 5Run — creates the caption files.
- 6Log — one line per file created.
Tag Editor — clean every caption in one go
Remove or replace a word in every caption of a folder. Here, the tag watermark is removed from 8 files.
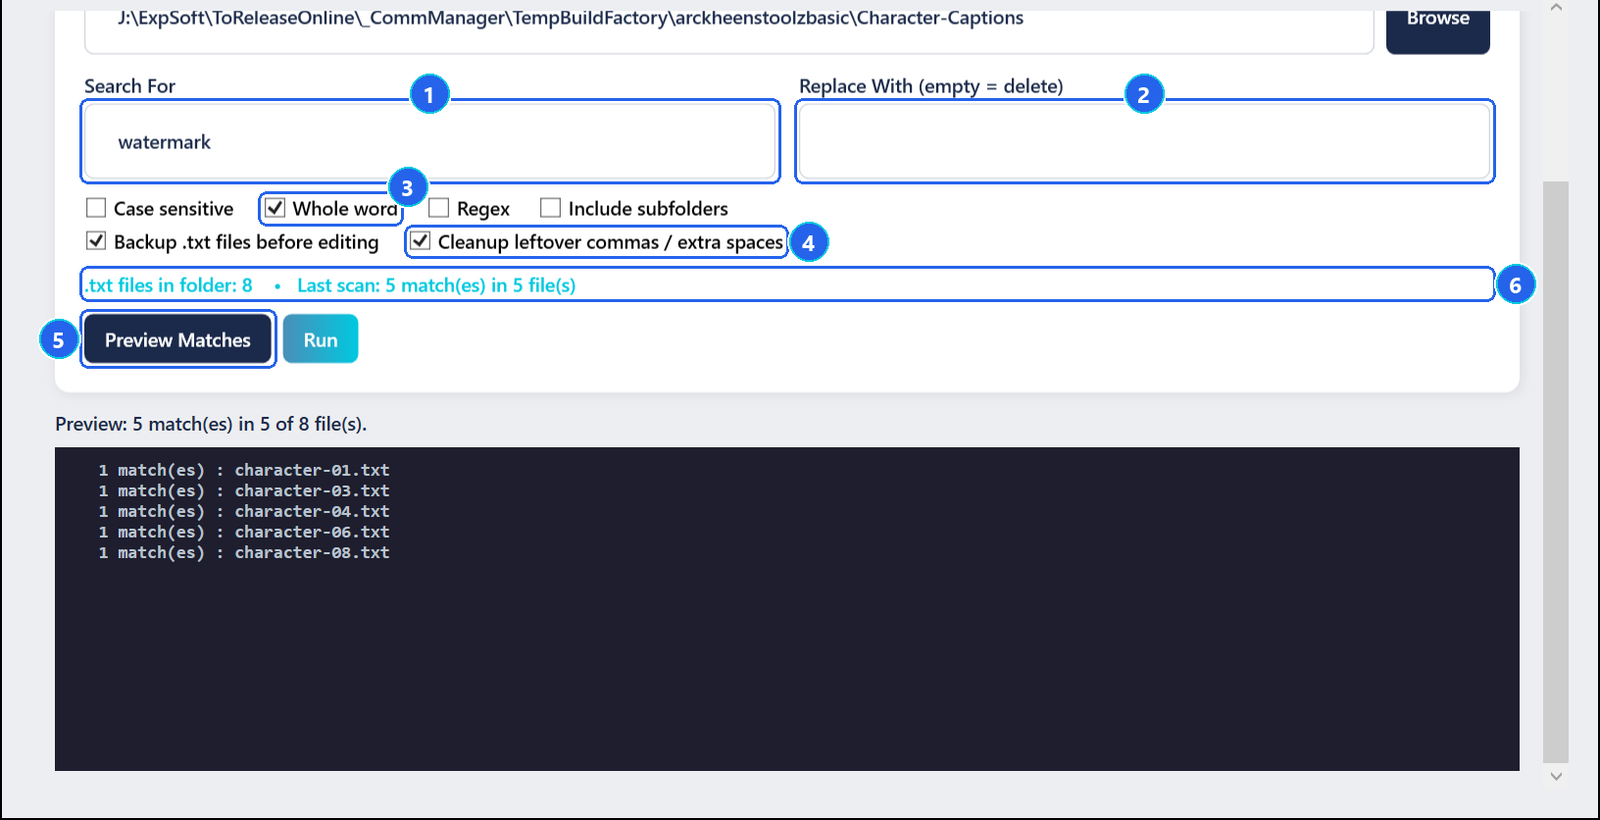
- 1Search For — the tag, word or phrase to find.
- 2Replace With — the new text. Leave it empty to delete.
- 3Whole word — matches cat but not category. Case sensitive and Regex are also available.
- 4Cleanup leftover commas — after a delete, removes the empty
, ,left in tag lists. - 5Preview Matches — counts the matches without changing anything.
- 6Counters — how many files, and how many matches in how many files.
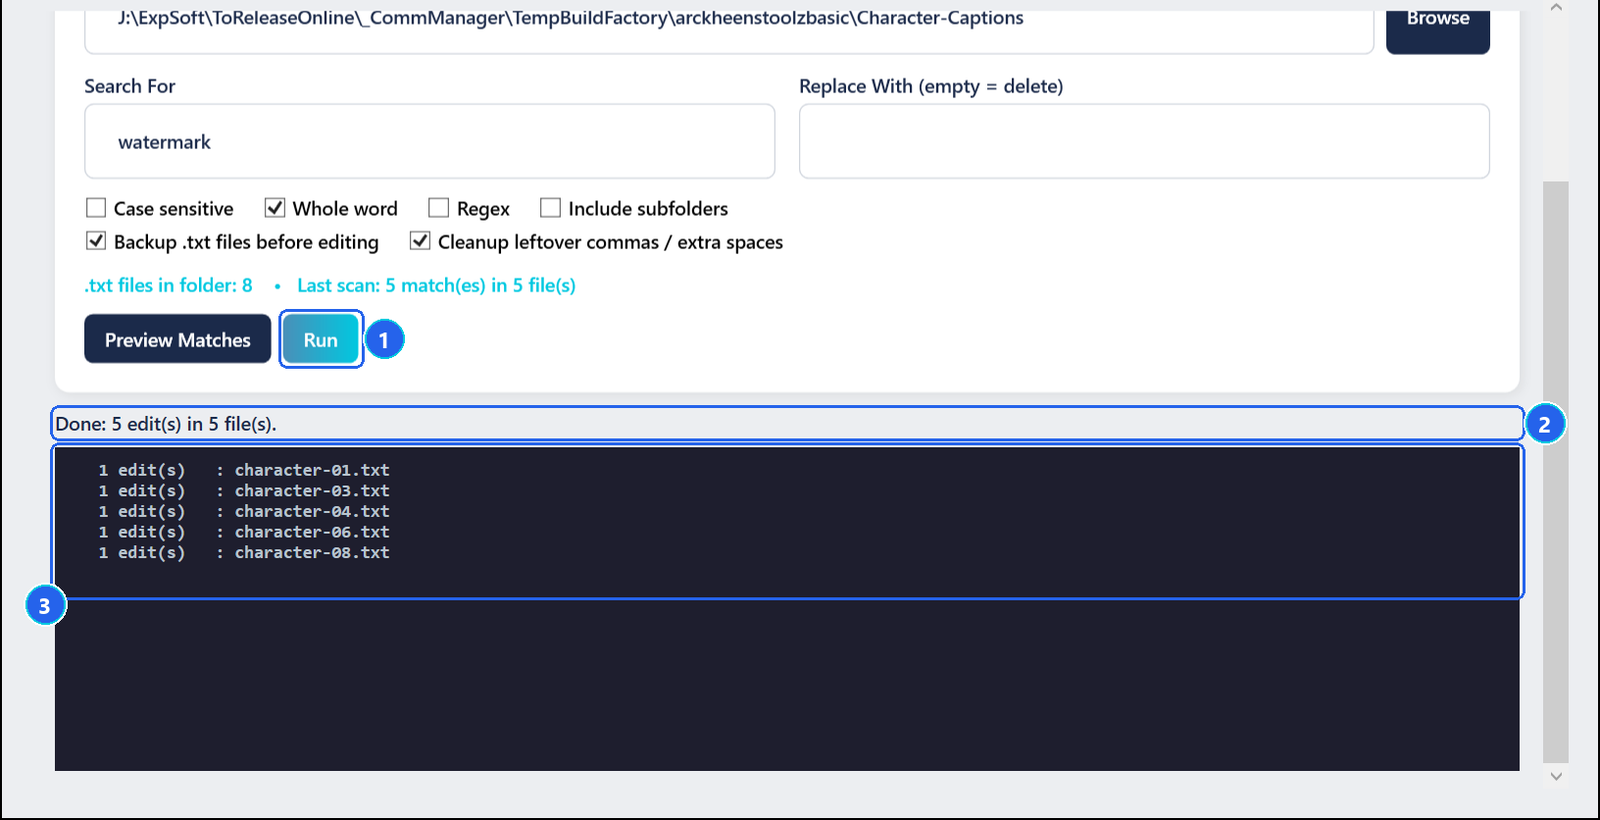
- 1Run — applies the change to every matching file.
- 2Status — the number of edits made.
- 3Log — one line per file changed.
name.txt.YYYYMMDDHHMMSS.bak.Prompts — all captions in one file
Collects every caption of a folder into a single prompts file, one line per caption — handy to test a model with the real captions of a dataset.
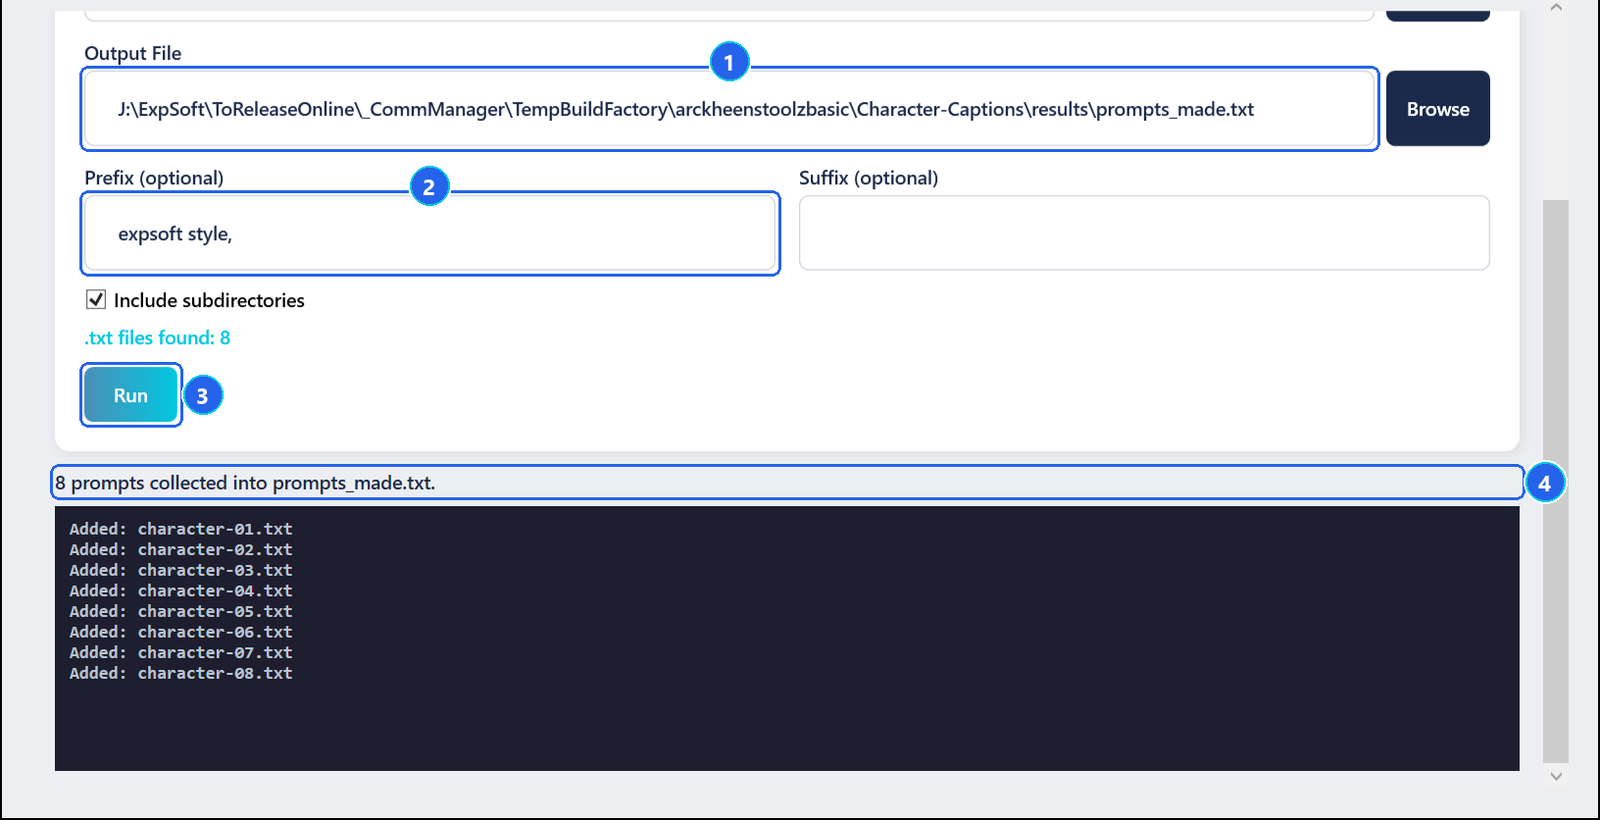
- 1Output File — where the combined file is written.
- 2Prefix — optional text added before every line (a Suffix is added after).
- 3Run — builds the file.
- 4Status — how many prompts were collected.
Resizer — every image at the right size
Resize a whole folder to a target size, by its longest or shortest side, in PNG at maximum quality.
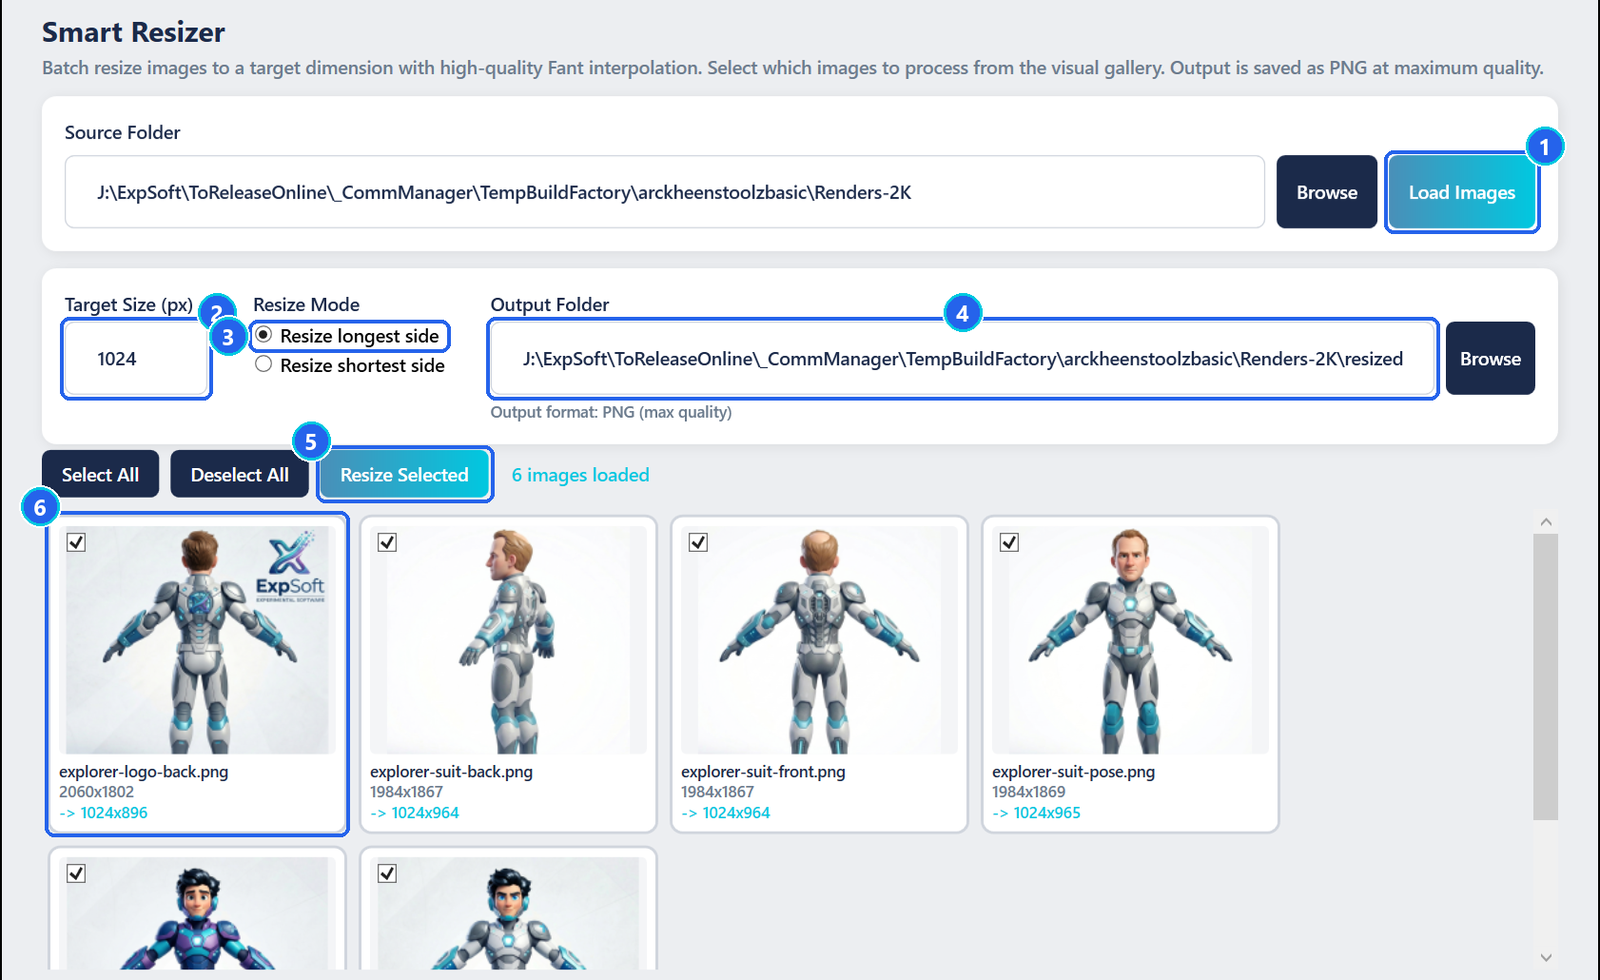
- 1Load Images — shows the images of the source folder as a gallery.
- 2Target Size — in pixels, for example 1024.
- 3Resize longest / shortest side — which side gets the target size; the other one follows the proportions.
- 4Output Folder — filled in for you:
resizedinside the source. - 5Resize Selected — resizes the ticked images (Select All / Deselect All above).
- 6Thumbnail — untick an image to leave it out.
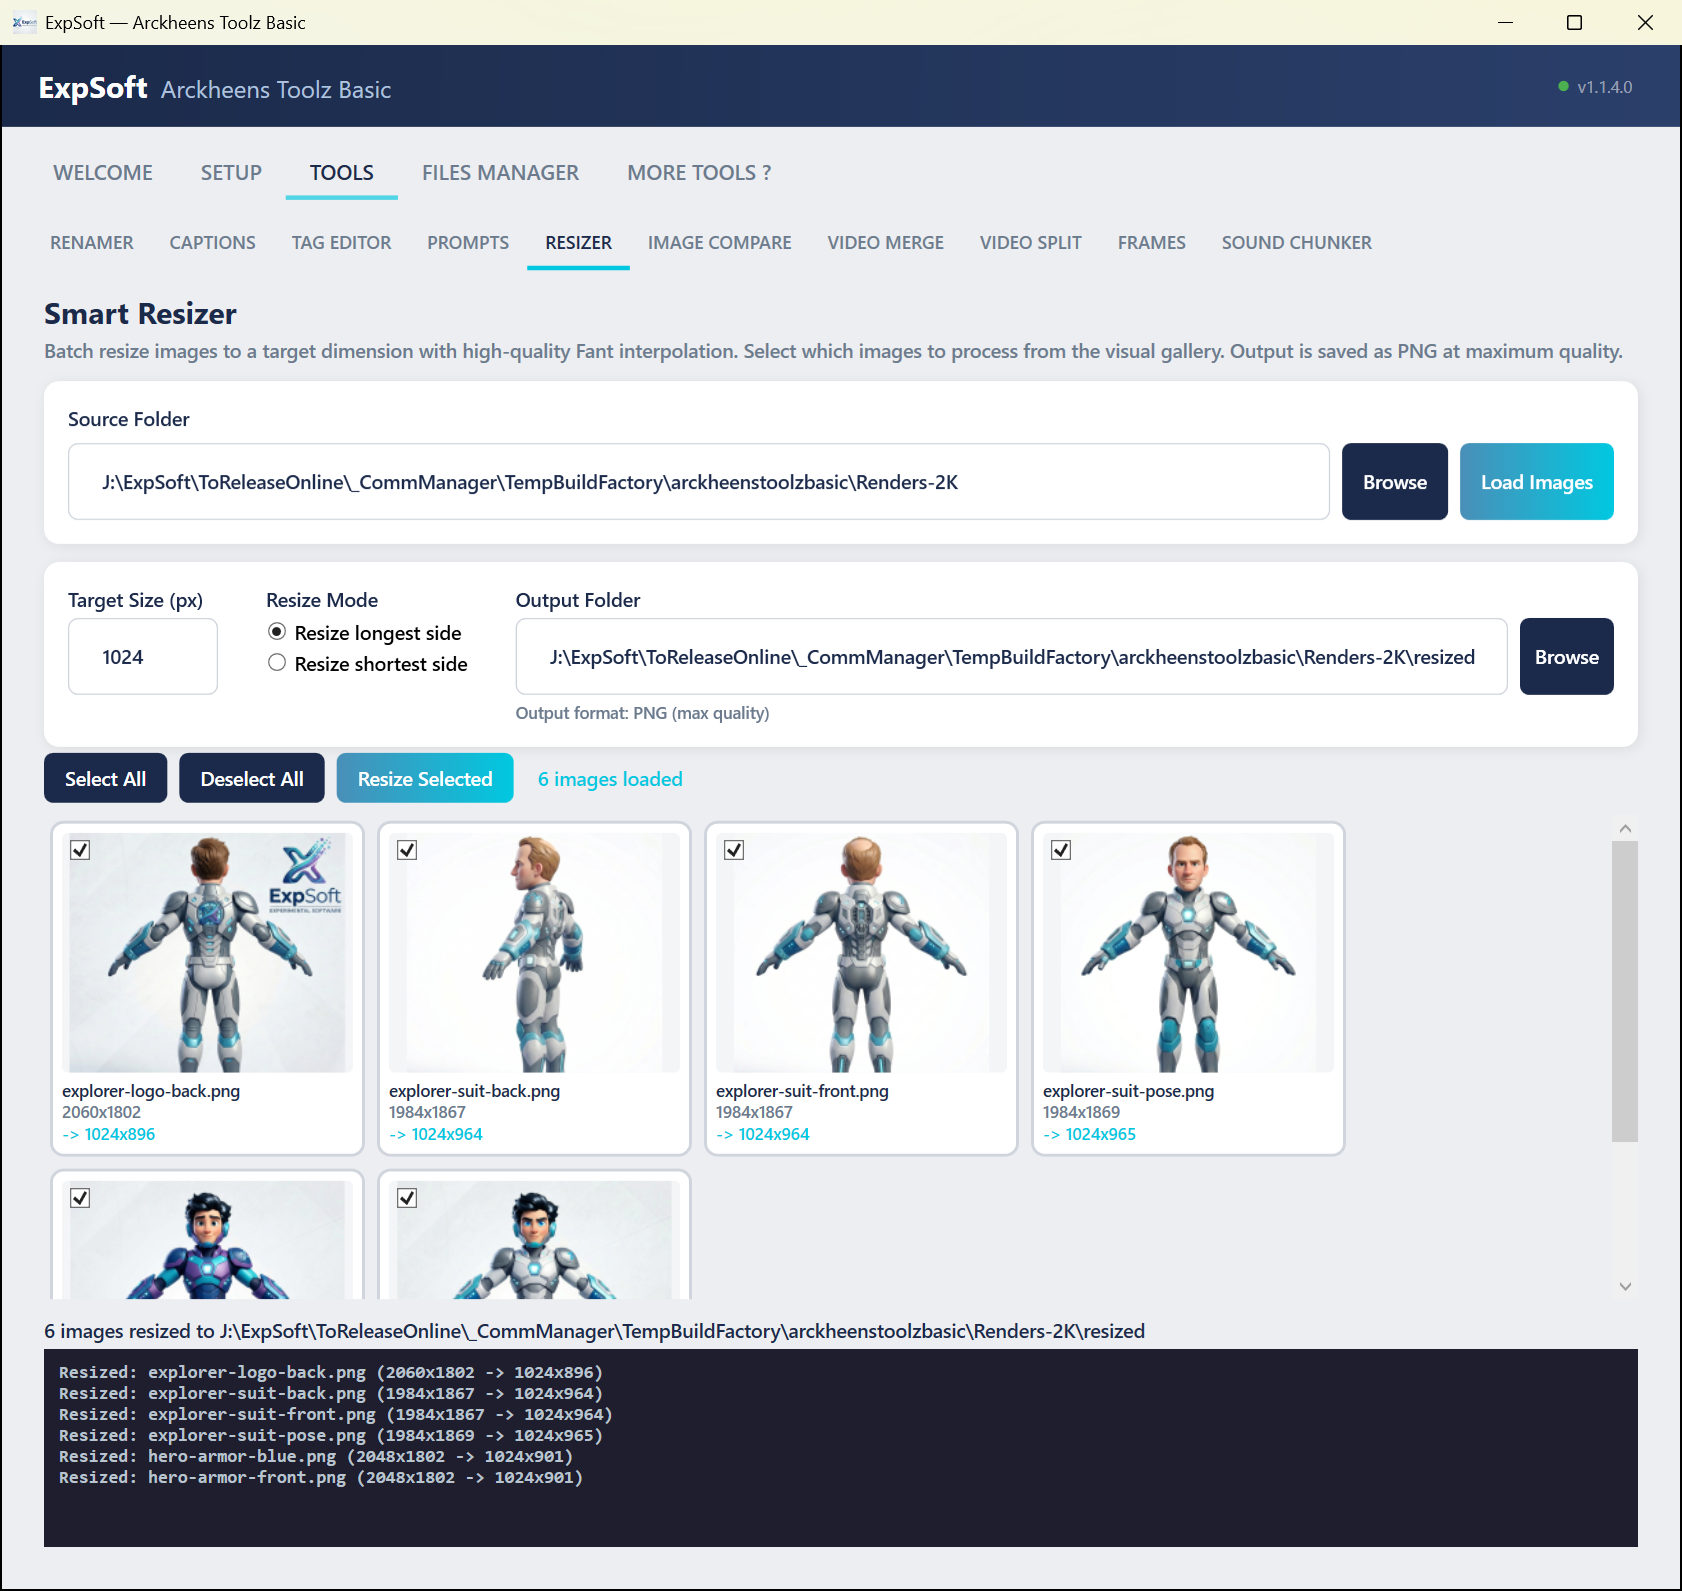
Image Compare — before and after, side by side
Load two images and drag the slider to see the difference: an upscale, an edit, two model outputs.
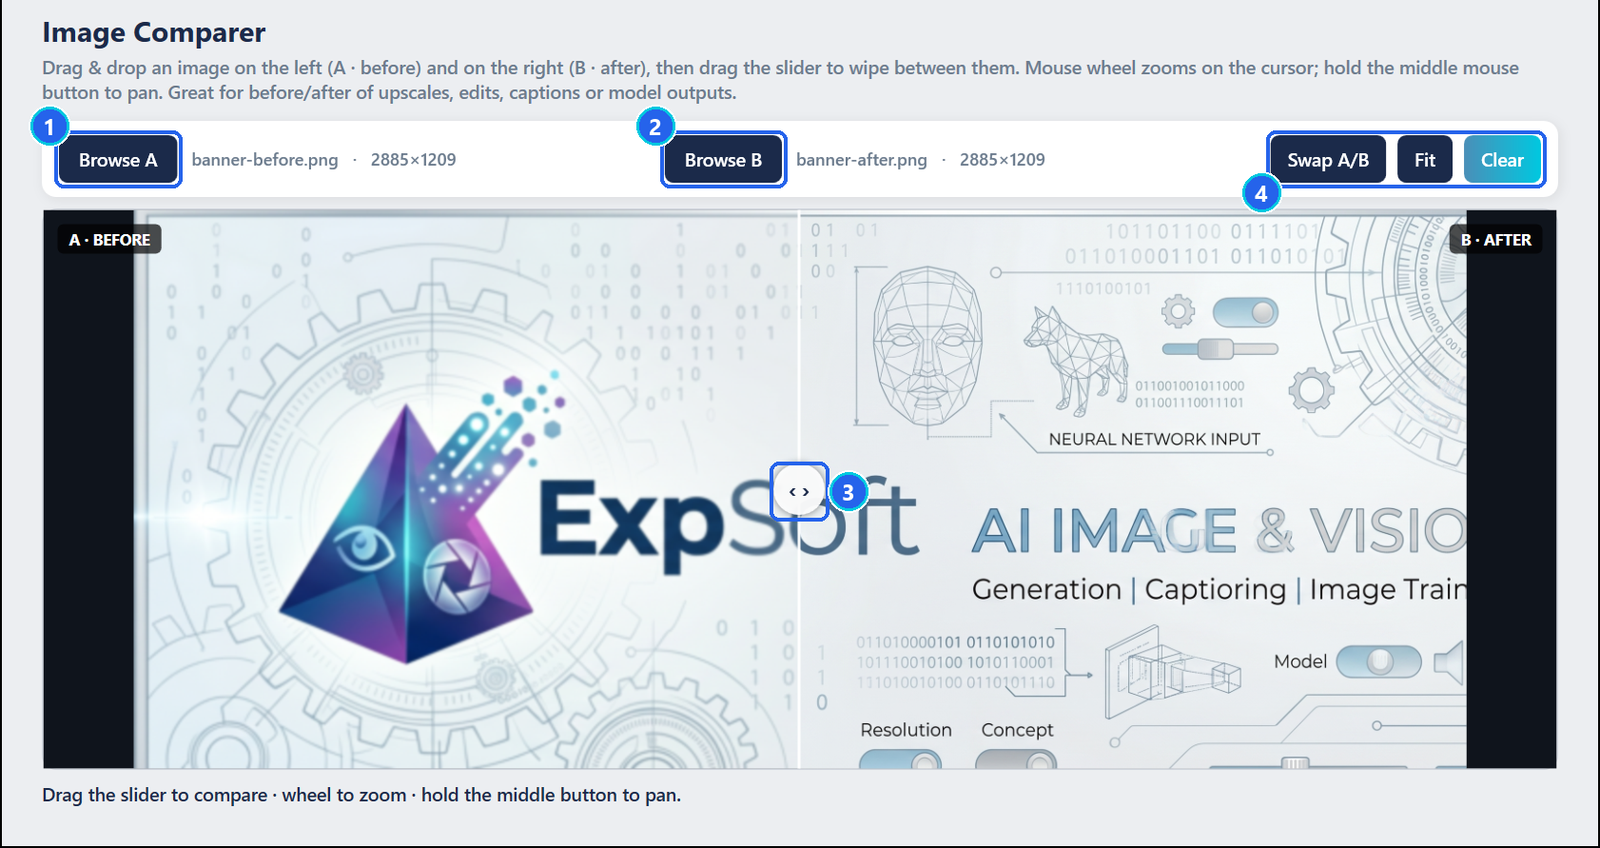
- 1Browse A — the before image — or drop a file on the left half.
- 2Browse B — the after image — or drop a file on the right half.
- 3Slider — click or drag anywhere in the view to move it.
- 4Swap A/B, Fit, Clear — exchange the two images, reset the zoom, empty both slots.