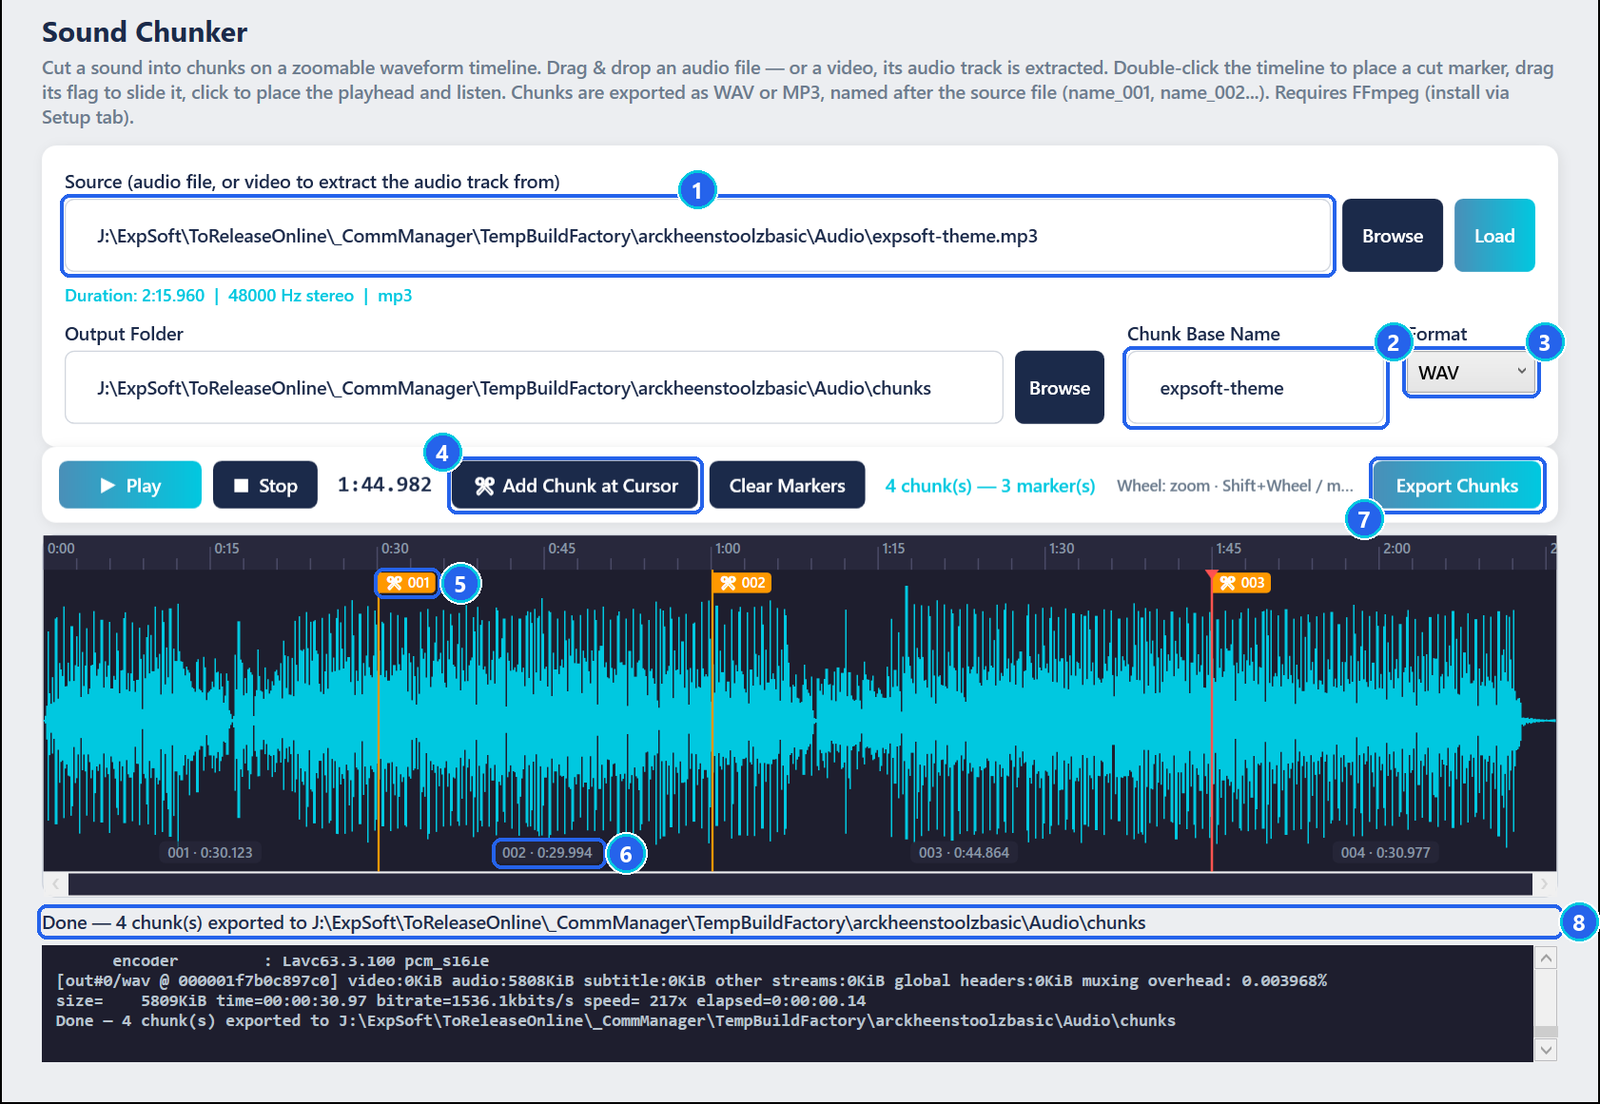
- 1Source — an audio file, or a video: its sound track is used.
- 2Chunk Base Name — the chunks are named
base_001,base_002… - 3Format — WAV (lossless) or MP3.
- 4Add Chunk at Cursor — places a cut at the playhead.
- 5Cut marker — drag its flag to move it; right-click it to remove it.
- 6Chunk length — shown at the bottom of every chunk.
- 7Export Chunks — cuts the original file and saves every chunk.
- 8Status — how many chunks were exported, and where.
Step 1
Load the sound
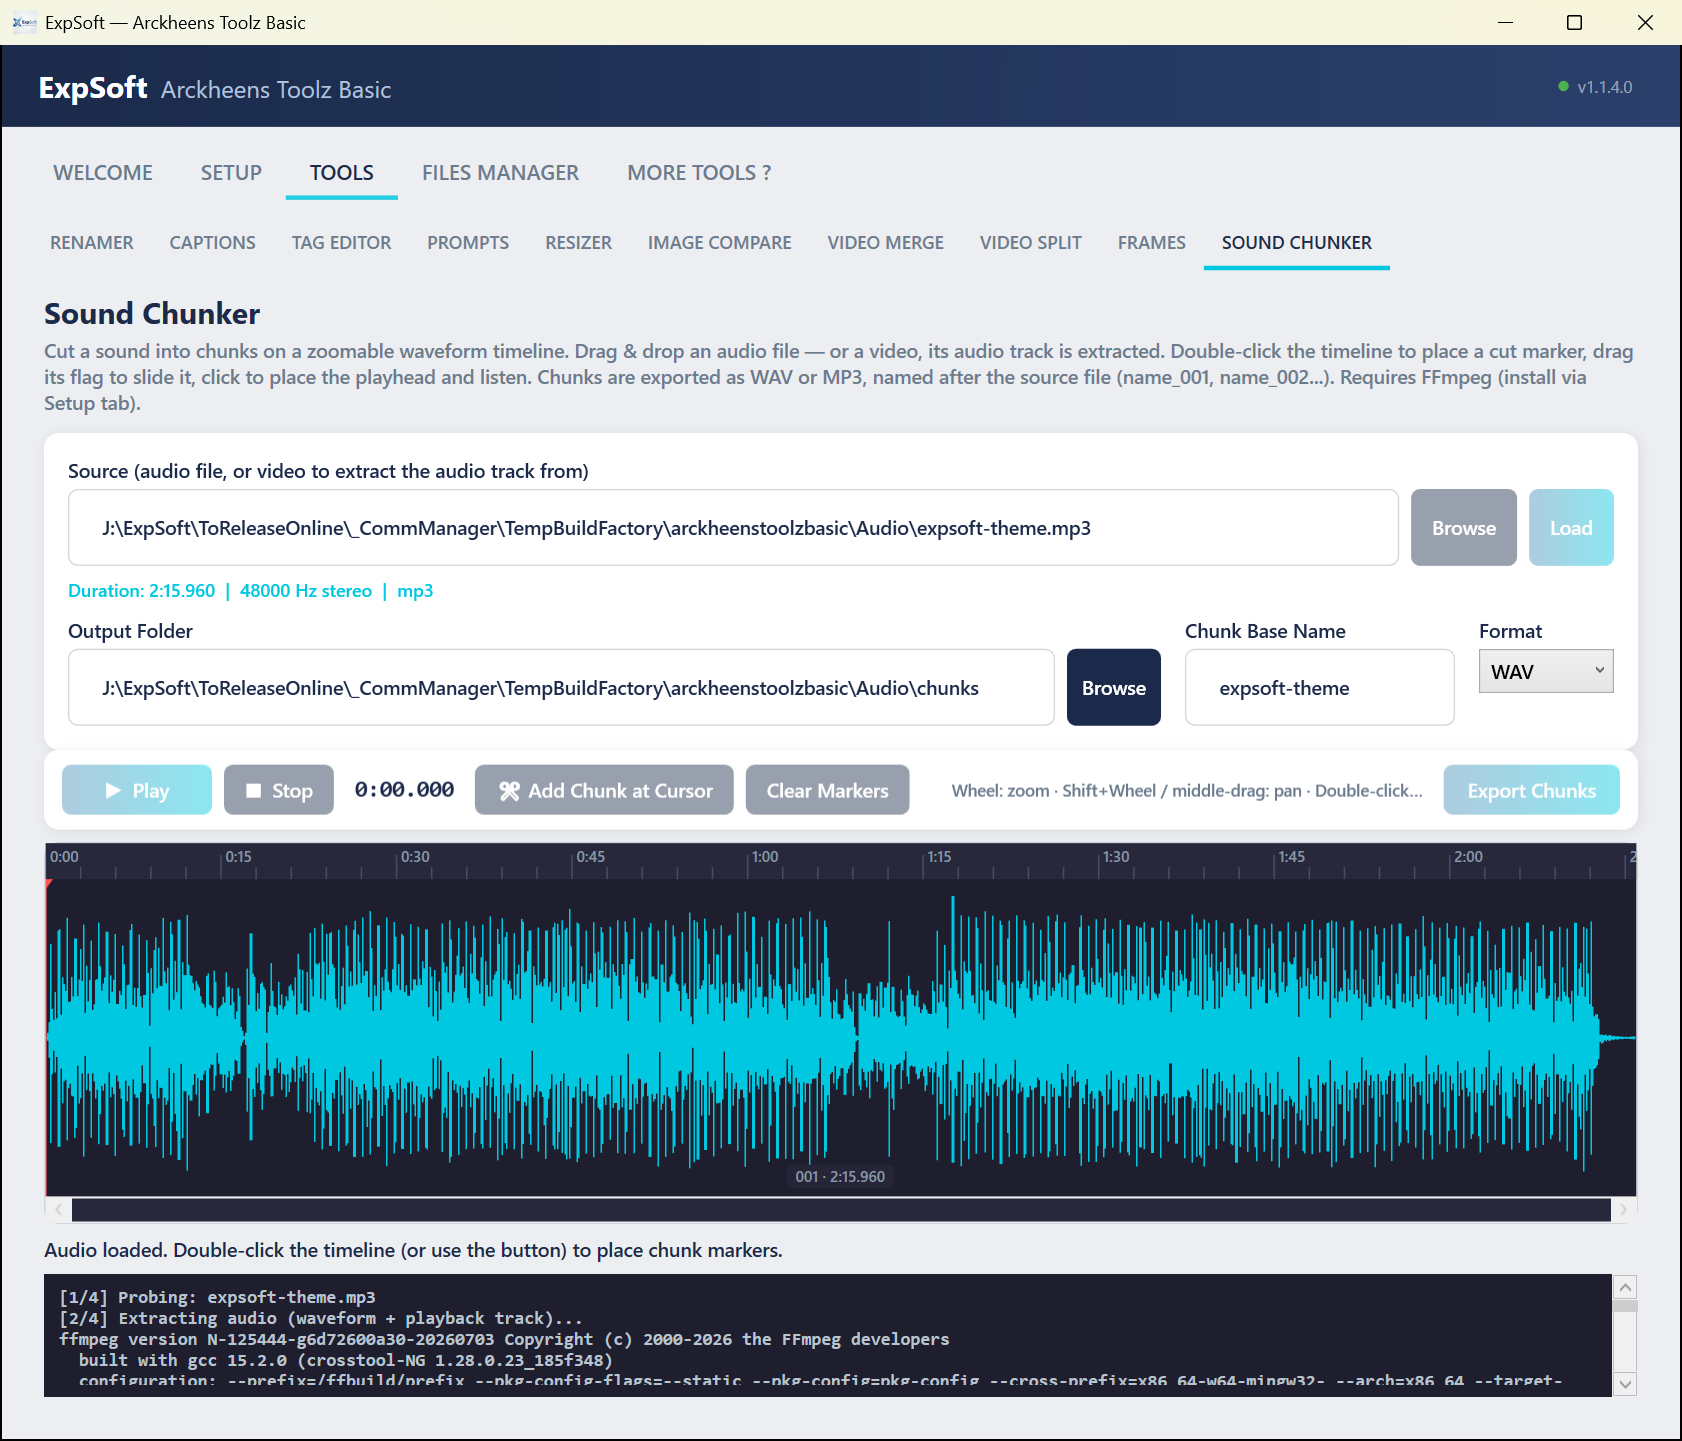
Drop an audio or video file on the timeline, or click Browse then Load. The duration, sample rate and format appear under the path, and the waveform fills the timeline.
Step 2
Place the cuts
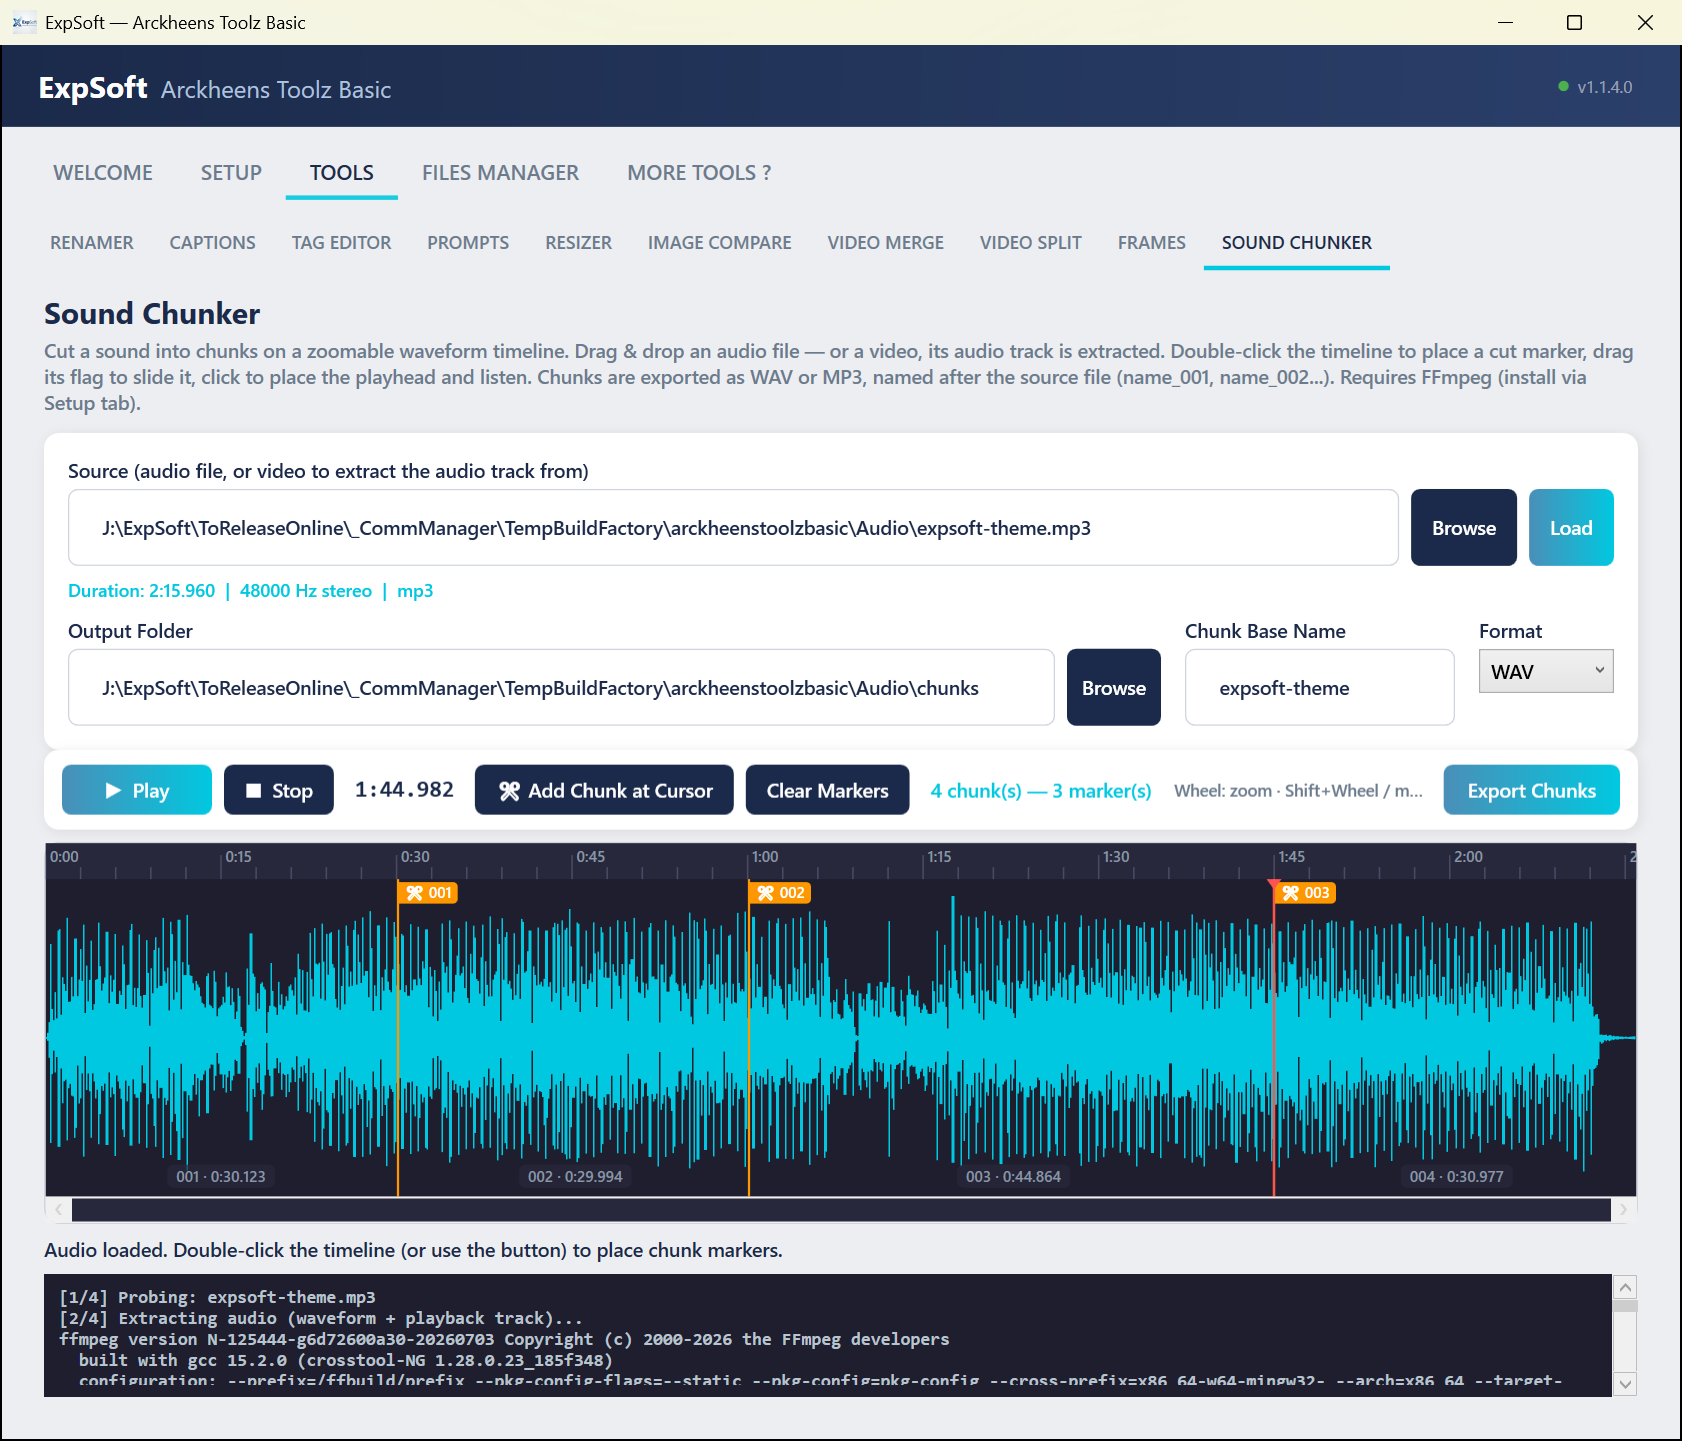
Double-click the timeline where a chunk should end, or click to move the playhead and press Add Chunk at Cursor. Every chunk shows its length; the counter says how many chunks and markers you have.
Step 3
Listen
Click anywhere on the timeline to put the playhead there, then Play. Stop goes back to where playback started, so you can check a cut again and again.
Step 4
Export
Choose WAV or MP3 and click Export Chunks. Each chunk is cut from the original file, so nothing is lost; the files go to chunks next to the source unless you pick another folder.
Mouse & keys
| Gesture | Action |
|---|---|
| Click | Move the playhead |
| Double-click | Add a cut marker |
| Drag a flag | Move a cut |
| Right-click a flag | Remove a cut |
| Mouse wheel | Zoom on the cursor |
| Shift + wheel, or middle-button drag | Pan |